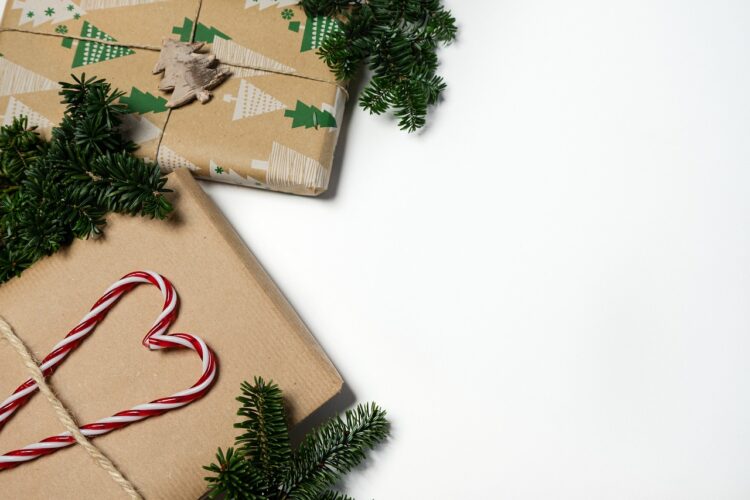
The excitement of Christmas brings with it the joy of gift-giving, and there’s nothing quite like the thrill of unwrapping a beautifully presented gift. While the gift itself is undoubtedly important, the wrapping can elevate the experience and create a sense of anticipation. If you’re looking to impress your family and friends this holiday season, mastering the art of gift wrapping is essential. Here’s your complete guide to wrapping Christmas gifts like a pro!
1. Gather Your Supplies
Before you start wrapping, it’s important to gather all your materials. Having everything on hand will streamline the process and help you work efficiently. Here’s a comprehensive checklist of what you’ll need:
- Wrapping Paper: Choose various designs to suit the personalities of your recipients. From traditional Christmas patterns to modern, minimalist styles, your choice can set the tone for your gifts. Consider opting for eco-friendly options such as recycled paper or fabric.
- Scissors: A sharp pair of scissors is crucial for clean cuts, ensuring that your edges look neat and professional.
- Tape: While regular tape is versatile, double-sided tape can give your gifts a polished appearance. Consider using decorative tape for an added flair.
- Ribbons and Bows: These embellishments add a finishing touch that enhances the overall presentation. From luxurious satin ribbons to playful curling ribbons, the right choice can make all the difference.
- Tags or Cards: Personalizing your gifts with tags or cards makes the unwrapping experience feel special. You can easily make your own or purchase beautiful pre-made ones.
- Gift Bags and Boxes: These alternatives can simplify the wrapping process and add variety to your gifts. Consider decorative bags or themed boxes that align with your gifts’ personalities.
2. Measure and Cut the Paper
To ensure your gift is wrapped perfectly, proper measuring and cutting of the wrapping paper is essential. Here’s a step-by-step guide:
- Place the Gift: Start by placing your gift box face down in the center of your wrapping paper. This allows you to see how much paper you’ll need to cover all sides.
- Measure the Paper: Fold one side of the wrapping paper over the gift. Then fold the opposite side over to see how much paper overlaps. Ideally, you want a few inches of overlap.
- Add Extra Length: When you measure, leave about 2-3 inches of extra paper on each side to ensure you have enough to secure the ends properly.
- Cut the Paper: With a sharp pair of scissors, cut the paper in a straight line to maintain a clean edge. A straight cut contributes to a professional look.
3. Secure the Gift
Now that you have the correct size of wrapping paper, it’s time to secure your gift. Follow these simple steps:
- Position the Gift: Place your gift box right-side up on the center of the wrapping paper.
- Fold One Side: Fold one side of the paper over the gift, ensuring it covers the box completely. Use a piece of tape to secure it in place.
- Fold the Other Side: Repeat the process with the other side of the paper. Pull the paper taut, and tape it down neatly.
- Fold the Ends: This step can be tricky, but it’s important for a professional look. Push the sides of the wrapping paper down toward the box to create flaps, then fold them up, securing with tape. Make sure the ends are crisp and neat.
4. Add Decorative Elements
Once your gift is securely wrapped, it’s time to elevate its appearance with some decorative elements. Here are some creative ideas:
- Ribbons and Bows: A well-placed ribbon can dramatically enhance the look of your gift. Try different styles, such as:
- Classic Bow: Create a large, elegant bow using satin ribbon for a sophisticated touch.
- Curled Ribbon: For a fun, festive look, use curling ribbon and curl the ends with your scissors.
- Twine: A rustic look can be achieved with jute or twine, particularly for a more natural or farmhouse style.
- Gift Tags: Personalize your gift with a tag that includes the recipient’s name and a heartfelt message. You can create your own using cardstock and decorate them with stamps, stickers, or even drawings. Consider using tags that match the wrapping paper for a cohesive look.
- Natural Elements: Incorporate elements from nature, such as sprigs of pine, holly, or even small pinecones. Attach these with twine or ribbon to give your gift a charming, rustic vibe.
- Themed Decorations: If your gift is for a particular occasion, consider adding themed decorations. For example, snowflake ornaments for a winter-themed gift or mini Christmas ornaments for holiday cheer.
5. Experiment with Wrapping Techniques
To really stand out this holiday season, try out different wrapping techniques. Here are some popular methods:
- Furoshiki: This Japanese method uses fabric to wrap gifts and is eco-friendly and reusable. You can use beautiful scarves, dish towels, or fabric remnants for a unique and elegant presentation.
- Boxed Gifts: Instead of wrapping paper, use decorative boxes that can be reused. Fill the box with tissue paper or shredded paper to keep the gift secure and add a touch of elegance.
- Layering: Create an eclectic look by layering different types of wrapping materials. For instance, use a solid color as a base and layer a patterned paper over it, or use fabric and wrap it with twine.
6. Consider Eco-Friendly Options
As we become more aware of our environmental impact, choosing eco-friendly wrapping options is increasingly popular. Here are some ideas:
- Recycled Wrapping Paper: Choose wrapping paper made from recycled materials. This option is often just as beautiful and can come in various designs.
- Brown Kraft Paper: A classic choice that is both affordable and biodegradable. You can personalize it with stamps, drawings, or stickers for a more personal touch.
- Fabric Wrapping: Using fabric, such as cotton or linen, is a sustainable option that can also be reused. After unwrapping, the recipient can keep the fabric for their use.
- Old Maps or Newspaper: Repurpose old newspapers or maps as wrapping paper for a vintage or artistic look. These materials can be complemented with colorful ribbons or twine.
7. Wrap with Care
When wrapping gifts, taking your time can lead to a more polished final product. Here are some tips for ensuring your wrapping is done with care:
- Smooth the Paper: As you wrap, smooth out any wrinkles or creases. This creates a neater appearance and helps the tape adhere better.
- Secure with Precision: Use tape sparingly but effectively. A few pieces of well-placed tape can be enough to secure your wrapping without making it look cluttered.
- Practice Makes Perfect: If you’re unsure about your wrapping technique, practice on smaller items first. The more you wrap, the more confident you’ll become!
8. Personalize Your Approach
Every gift is unique, and adding personal touches can make your wrapping even more special. Here are a few ideas to personalize your wrapping:
- Know Your Audience: Tailor your wrapping style to fit the recipient’s personality. A child might appreciate colorful paper adorned with fun characters, while an adult might prefer elegant, monochromatic wrapping.
- Theme It: If you have multiple gifts for the same recipient, consider wrapping them in a cohesive theme. Use the same color palette or wrapping style to create a visually appealing collection.
- Include a Special Note: Adding a handwritten note or card can elevate your gift. Share a personal memory or a heartfelt message that expresses your appreciation for the recipient.
9. The Art of Presentation
A gift’s presentation goes beyond just wrapping; it encompasses the entire experience from the moment it’s given. Consider these tips for a professional touch:
- Gift Display: When presenting your gifts, consider arranging them creatively. Use trays or decorative boxes to create a visually pleasing display.
- Use Layers: If you’re giving multiple gifts to one person, stack smaller gifts inside a larger box or bag for a delightful surprise as they unwrap each layer.
- Add a Festive Touch: Use decorative elements such as mini ornaments, candy canes, or festive confetti in the wrapping. These small details can add charm and excitement.
10. Cleaning Up and Eco-Friendly Disposal
Once the wrapping is complete, it’s important to think about how you can dispose of the materials responsibly:
- Recyclable Materials: Check if your wrapping paper, ribbons, and tags are recyclable. Many papers can be recycled if they aren’t heavily coated in foil or glitter.
- Compostable Options: If you used natural elements like twine or untreated paper, consider composting them.
- Encourage Reuse: If your gifts are in bags or boxes, encourage recipients to reuse them. This promotes sustainability and reduces waste.
Conclusion
Wrapping Christmas gifts like a pro is about more than just putting paper around a box; it’s about creating an experience filled with thoughtfulness and creativity. By gathering the right supplies, mastering essential techniques, and adding personal touches, you can elevate the presentation of your gifts and make the unwrapping moment memorable.
This holiday season, let your creativity shine and embrace the art of wrapping gifts with joy and love. After all, the time and effort you invest in wrapping are a reflection of the care you have for the recipient. So gather your supplies, experiment with different techniques, and enjoy the process. Happy wrapping, and may your holiday season be filled with warmth, joy, and beautiful moments!


